What is the best Everest Base Camp trek packing list?
I typed this phrase into Google countless times in the weeks before embarking on my very own Everest Base Camp trek, and was met with tons of information from all types of hikers.
There were the experts who have all the top-of-the-line gear, down to underwear that is specially-made for trekking. There were the professional photographers who were bringing a bag just for their extra cameras and lenses, as well as a 15-pound tripod.
And there were those who were packing for what seemed like a month-long trip to the Swiss Alps, trendy clothes and all.
But we didn’t find anything that quite matched our style.
Here’s what we were considering while making a packing list:
-
We were arriving in Nepal after months of backpacking in tropical Southeast Asia, so any trekking gear we do own was left at home. We needed to buy minimal cold weather gear, but didn’t want to spend a fortune.
-
We have a big camera and some important electronics, but we didn’t want to bring many bulky accessories.
-
We wanted to carry everything ourselves without hiring a porter. This meant that we wanted to keep our total weight below 15 kg (33 pounds) each.
So we scoured all sorts of websites, talked to other travelers who had made the trek before us, packed and repacked, and finally came up with what was, for us, the ultimate packing list for our 16-day trek to Everest Base Camp and Gokyo Lakes.
We’ve got you covered with everything we brought (or wished we had packed) and the things needed for the EBC trek. Continue reading for our detailed packing list, plus tons of tips we learned along the way!
Related: Eco-Friendly Packing List to help minimize your footprint on the EBC trail.
Everest Base Camp Packing List Article Contents

Essential Travel Item for Everest Base Camp
We never travel without this item and it’s even more important to have it when hiking to Everest. Travel insurance is an essential item you need to have to trek to Everest Base Camp. We always travel with insurance and have written how we find the best and cheapest coverage.
We bought World Nomads travel insurance before left for Lukla because it covers you for high altitude rescues, where many others don’t. You can get a quote in 5 minutes. Just head to the World Nomad’s website and plug in your information and trekking dates.
Don’t forget to get your Trekkers’ Information Management Systems (TIMS) card before you start on your trek. You can get this in Kathmandu and is basically your hiking permit for the Everest Region. Find out more how to get your TIMS card and Everest trekking permits.
EVERYTHING you need to plan your EBC trek!
EBC Clothes for Female and Male Trekkers
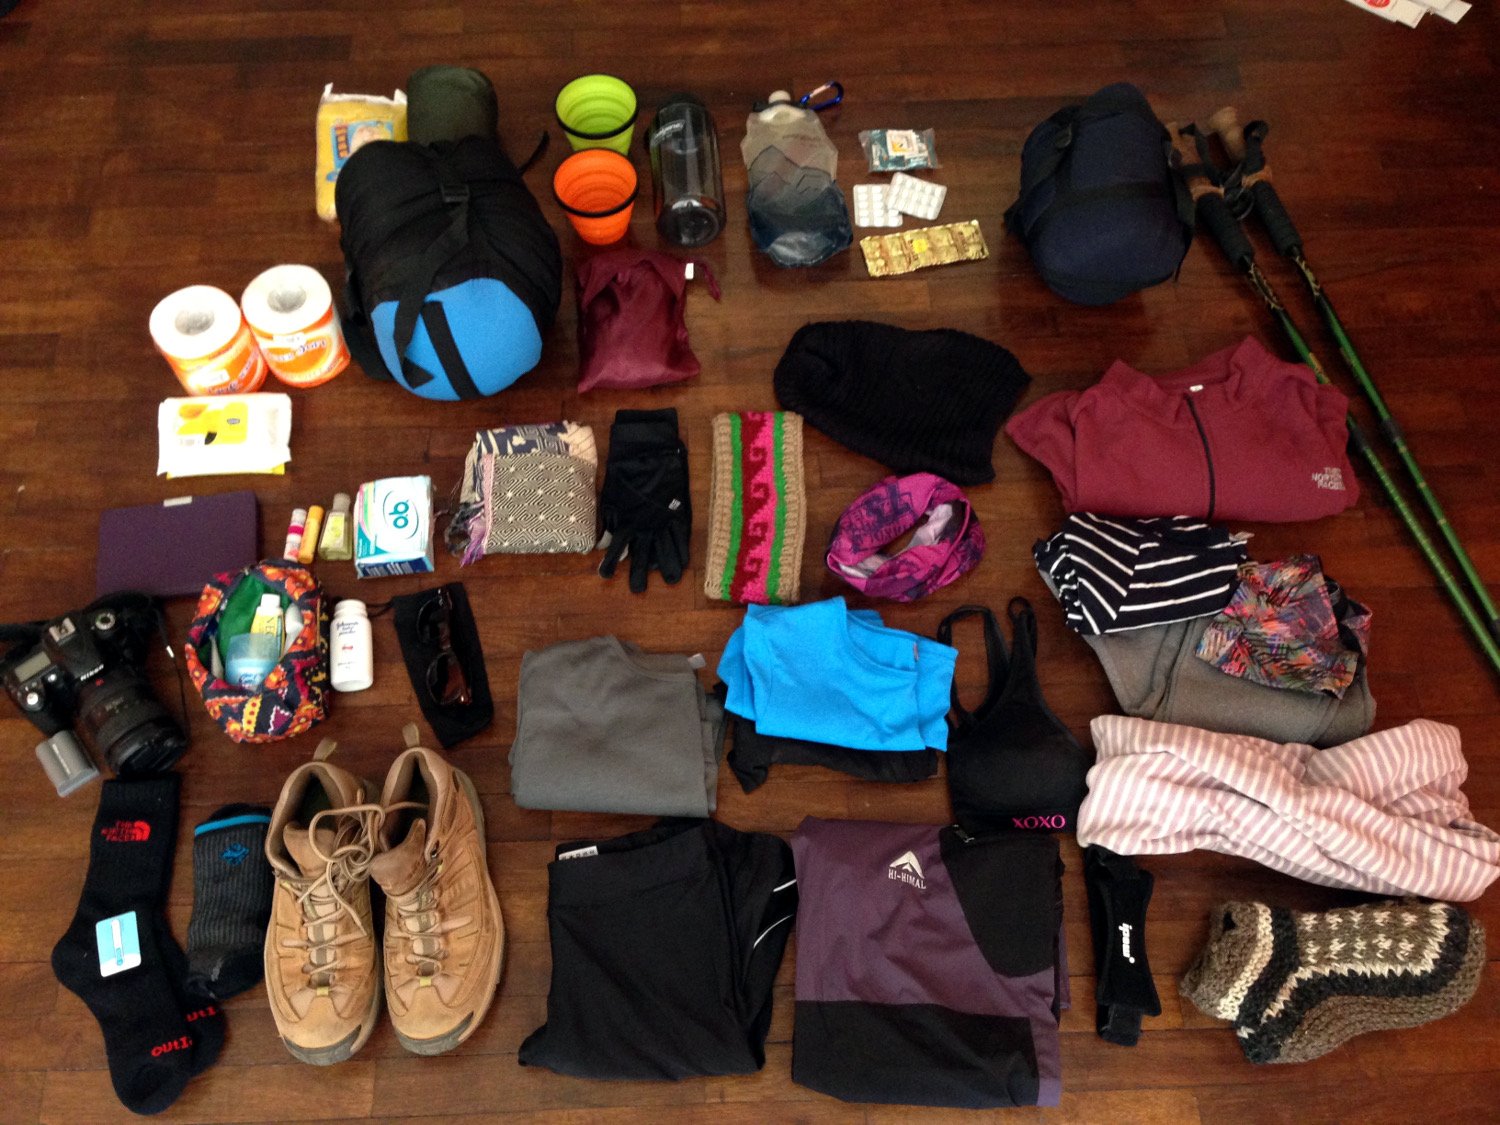

We each had two sets of clothes: one for during the day while we were trekking, and one to wear in the tea houses at night.
We packed them in an Eagle Creek 2-sided packing cube, so we could keep them in separate compartments. Packing this way, we felt fresh each night when we changed into our “clean” clothes.
The clothing listed below is for one person.
Trekking Clothing
-
1 pair of hiking boots, well broken in (Tip #1)
-
2 t-shirts (Tip #2)
-
1 long sleeve shirt for layering
-
1 pair of trekking pants (Tip #3)
-
1 pair of leggings or long underwear (Tip #4)
-
2 pairs of trekking socks (can be layered in cold weather)
-
3 pairs of underwear (Tip #5)
-
1 sports bra (ladies only, duh!)
Tip #1: We did meet a good handful of people who made the trek in sneakers. If you don’t have hiking boots, this is a possibility, and rest assured you won’t be the first person in history to attempt this trek with trainers.
Both Ben and I don’t have the strongest of ankles, and we wanted the extra support that boots give us. But we met a few pretty experienced hikers who actually prefer the flexibility of cross trainers. Just be sure that the sole has good traction – you’ll definitely need it!
If you’re unsure where to start with a new pair of hiking boots, take a look at this awesome infographic that details everything you need to know about hiking boots. When you’re ready to search for the perfect pair, we recommend Walsh Brothers Shoes outdoor line.
Another brand we’re loyal to is Vasque. They not only create sturdy lightweight boots, but their customer service is fantastic. Check out their line of boots here.
Tip #2: Some people prefer every article of clothing to be quick-dry, but we just had regular cotton-spandex blends that we found to be fine.
Tip #3: Ben’s trekking pants were zip-off, but he rarely wore them as shorts. In lower elevations it does get warm enough, though he never felt it was necessary.
Tip #4: I (Katie) layered my leggings under my trekking pants when it was cold, and wore them on their own as a second pants option. Ben wore the same pair of trekking pants every day, but layered long underwear beneath when it got really cold.
Tip #5: Umm, this one is personal, obviously. Go with how ever many pairs of underwear you feel comfortable with. We usually wore the same few pairs for trekking during the day (because they’re just going to get dirty, right?!), and had a couple clean pairs for at night.
Accessories for Trekking
-
Poncho (one of those cheap, plastic ones is fine) or a rain jacket
-
Buff (Tip #6)
-
Sunglasses
-
Digital watch
Tip #6: Buffs have so many purposes – we used them as a scarf, a headband and a mask to keep out dust. Plus, sometimes we wore them over our mouths so that the air we breathed wasn’t so dry. We have had ours for a couple years, but we saw them for sale at cheap prices in Kathmandu.
Tea House Clothing
-
1 pair of slippers that pack down small (Tip #7)
-
1 pair of plastic slip-on sandals for toilet runs (we shared one pair between the 2 of us)
-
1 t-shirt or lightweight long sleeve shirt
-
1 fleece long sleeve
-
1 pair of fleece pants
-
1 pair of cotton ankle socks (for when it’s warm)
-
1 pair of thick wool socks (we like Smart Wool)
-
1 down jacket with a stuff sack (Tip #8)
-
Winter hat (or headband) that covers ears
-
Thin gloves (Tip #9)
Tip #7: We bought our fleece-lined wool booties for $3 in Thamel (tourist district in Kathmandu where you can buy lots of last minute goodies.)
Tip #8: This jacket was an item that we rented in Kathmandu. We found the cheapest price (60 rupees per day) at Hi-Himal Sports Wear International (the same place we rented sleeping bags).
Most days, you will only need a warm jacket at night, as the sun will warm you up, and you’ll be moving lots. There were a few times at very high elevation we wore down jackets during the day.
Tip #9: There were only a few occasions that we needed gloves while trekking. And only twice did I feel that my thin gloves weren’t enough. My fix for this was to wear my Smart Wool socks over my hands until the sun came up and warmed them.
I guess this isn’t exactly the best solution, but we didn’t want to buy brand new mittens, so it does the trick if you’re in the same situation. If you have warm mittens that pack up small, this may be a better option.
Everest Base Camp Trekking Gear


-
Large backpack, ours were 60L (not packed full)
-
Sleeping bag, rented in Thamel for 60 rupees per day (Tip #10)
-
Silk sleeping bag liner (Tip #11)
-
Steripen and extra lithium batteries (Tip #12)
-
2 reusable 1-liter water bottles per person
-
2 headlamps (1 for each person) and extra batteries
-
1 packable backpack for day hikes
-
Packing cubes (3 per person), we like Eagle Creek brand (Tip #13)
-
Trek map (Tip #14)
-
Guidebook on Kindle (Tip #15)
-
Deck of playing cards (a necessity for killing time and meeting other travelers)
-
Small roll of duct tape (if you’re like us, some of your gear will break, and duct tape will come to the rescue!)
-
Pocket knife
-
Ear plugs for plane ride, optional (Tip #16)
-
Safety whistle (these are often attached to trekking backpacks, and it’s a good idea to have)
-
Compass (we just used the compass app on our iPhones)
Tip #10: We did lots of searching for sleeping bags in Thamel (Kathmandu) for the best prices, and found that most stores required a hefty deposit. Plus, the average price seemed to be 100 rupees per day, which isn’t bad.
We found the best deal at Hi-Himal Sports Wear International in Thamel, where they required no deposit and charged just 60 rupees per day. I rented a down jacket here for the same price.
Tip #11: We bought our sleeping bag liners for a few dollars in Vietnam, and I assume you can get them in Thamel, though I’m not totally sure. We found it provided extra warmth, and is nice to have inside a rented sleeping bag. I know these can get quite expensive, and I don’t think it would be worth the $70-80 they often times sell for in the U.S.
Tip #12: The Steripen was one of the best things we packed! Having a water sterilizing system is a must on your trek if you want to save money. (Without any way to purify your own water, expect to pay upwards of $10 each day per person on bottled water if you are hydrating properly.)
You can purchase inexpensive iodine tablets in Kathmandu, but you have to wait for 30 minutes before your water is drinkable. The Steripen only takes 90 seconds.
Tip #13: We used the 2-sided cube to separate our teahouse outfit from our trekking clothes, and 2 other cubes to keep toiletries, snacks and other gear organized.
Tip #14: We would highly recommend picking up a trekking map of these in Kathmandu. The map will give you a visual reference as well as elevations of each place on your route. You can choose maps based on your route and by how detailed you’d like it to be.
The one we chose was just $2 USD. We even picked up another one on our way out of Kathmandu to keep as a souvenir!
Tip #15: We had the Lonely Planet Nepal Trekking guidebook and found it to be very helpful and informative. It describes each leg of the trek in detail and even suggests teahouses (we did not agree with some of the recommendations, and we share our opinion in our itinerary).
Purchasing this e-book on Kindle will save you lots of valuable weight! To save money, rent this e-book through your local library. Typically the rental period is 2 weeks, which should give you plenty of time during this trek. (Plus, it won’t be removed from your device until you connect to Wi-Fi.)
Tip #16: You are given cotton on the plane ride to Lukla, but we preferred the earplugs we had packed in our First Aid Kit. Some people use them at night so other trekkers don’t awaken them, but we found this unnecessary.
Everest Base Camp Trek First Aid Kit


-
Diamox, take 125mg twice per day, can increase if needed, but consult your doctor (Tip #17 & #18)
-
Stoppers/goers (trust me, you will need them)
-
Painkillers (ibuprofen or Tylenol)
-
Cold medicine (It gets really cold at night which can cause you to get sick more easily)
-
Throat lozenges (Tip #19)
-
Vitamin C chewables
-
Electrolyte powder (Tip #20)
-
Bandaids (Plenty of them for blisters!)
-
Safety pin (To pop those blisters you’ll get on the first few days. Gross, I know, but I had to say it.)
-
Mole skin for blisters
-
Athletic tape
-
Gauze pads (we didn’t use this, but it’s good to have)
-
Small Ace bandage (we didn’t use this, but it’s good to have)
-
Neosporin (or other antibiotic ointment) – at high altitude, cuts take much longer to heal
Tip #17: We are not medical professionals, and we are only sharing our opinion. But from what we saw and experienced on the trail, we highly recommend taking Diamox to prevent altitude sickness.
Many of the people we encountered who got sick ended up buying these pills and felt better upon starting this regimen. The doctors at the high altitude clinics highly recommend taking Diamox and inform trekkers that it is in no way dangerous or masks the symptoms.
To learn more, go to the Himalayan Rescue Association of Nepal’s website on altitude sickness, treatment and prevention.
Tip #18: Buy Diamox pills in Kathmandu, only $1.45 for a 15-pack of 250mg. It’s at least triple the price to purchase these pills on the trail, and likewise if you get them at home.
Tip #19: The air at high altitudes is very dry, and as a result, I had a sore throat for most of the trek. Lozenges are expensive and hard to find on parts of the trail, so I’d advise bringing plenty.
Tip #20: We had not packed electrolytes, but we bought some on the trail after hearing a professional climber recommend it. Upon becoming sick and dehydrated, electrolytes helped a ton. Bring this from home if possible, because the brand sold on the trail is disgusting!
Everest Base Camp Trek Electronics


The electronics below are what we carry. Feel free to adjust this list to your needs.
-
Camera with charger (We use a Nikon D90, but if you want to know the camera we really want to upgrade to, check out our Travel Photography Tips article and scroll to the bottom)
-
2 iPhones (Tip #21)
-
SIM card, optional (NCell works well in the towns below Dingboche).
-
2 Kindle Paperwhites (with lots of books loaded! You’ll have lots of reading time at night or on acclimatization days) (Tip #22)
-
External battery charger (Tip #23)
-
Headphones
-
All charger cords, outlet plugs and adapters
Tip #21: Apps that were helpful along the trail: Compass, Trail Wallet (for keeping track of expenses), Converter (to see currency exchange or altitude/temperature conversion), Google Maps (if you load the area map ahead of time, you can see your location via GPS)
Tip #22: Loading the Lonely Planet Nepal Trekking Guidebook was one of the best things we did since we didn’t have a guide of our own!
Tip #23: It is possible to charge electronics at the teahouses, but it comes at a price. It gets more expensive the higher you go (and the more desperate you become!). Our Anker Portable Charger holds 7 charges (20100mAh), and saved us money and headaches. We only had to pay for one charge on our second to last night.
Everest Base Camp Trek Snacks
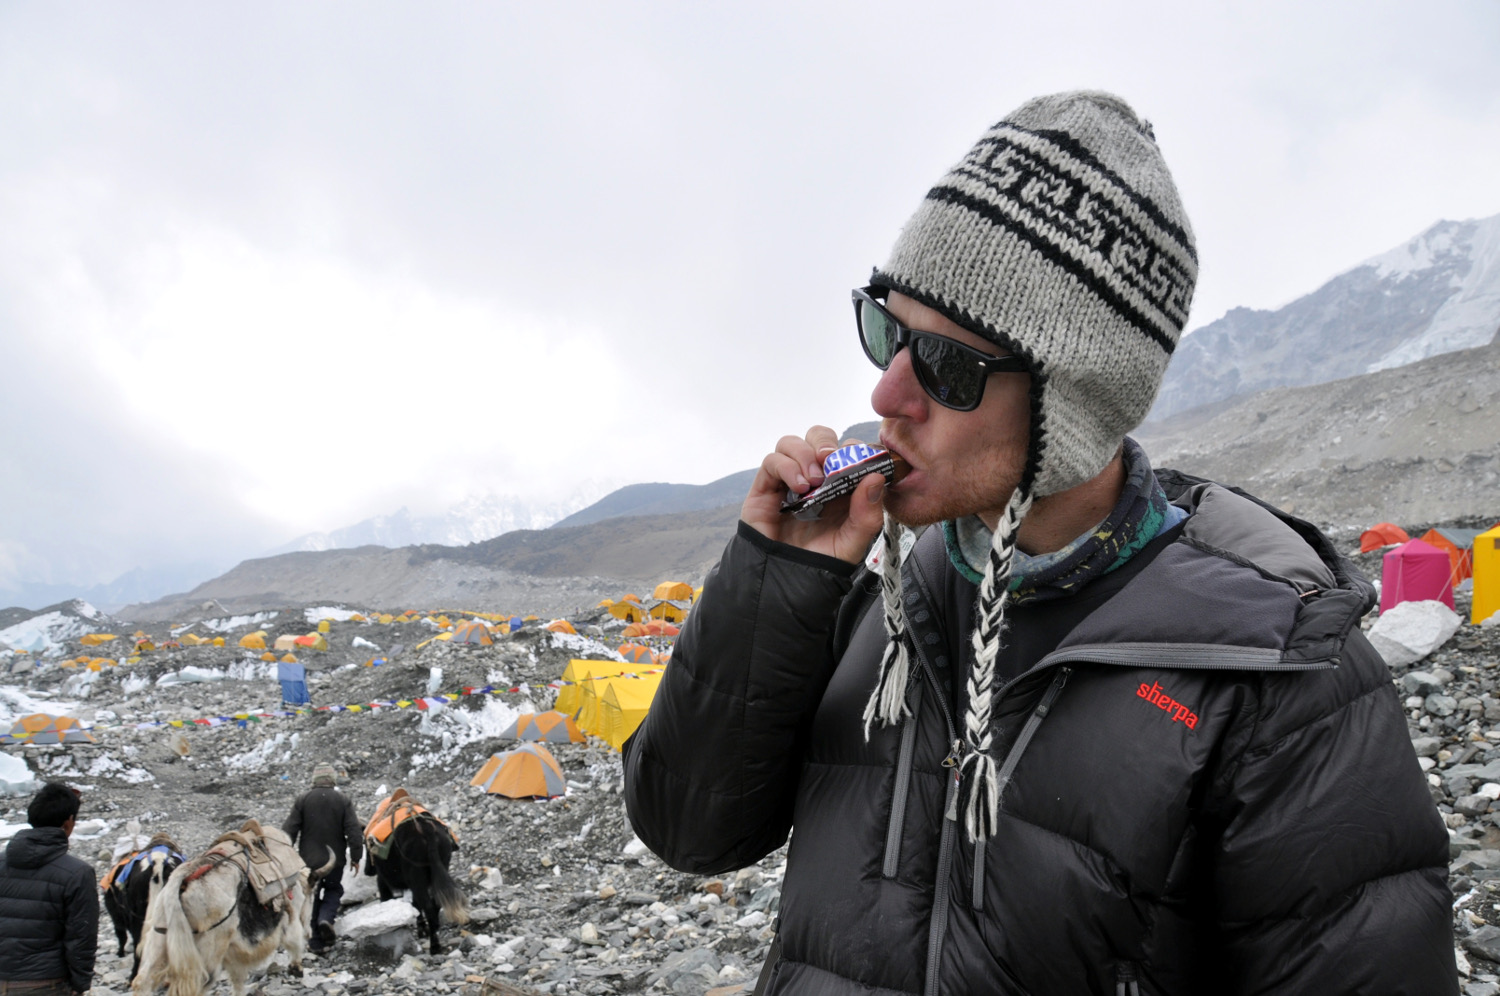


If you are coming from home or another country, we would recommend picking up snacks ahead of time. We found the options in Kathmandu were limited and prices were much higher than we were expecting. These are our suggestions for snacks:
-
Trail mix, divide into re-sealable bags for each day of trekking (Tip #24)
-
Granola bars
-
Muesli mix with dried raisins (Tip #25)
-
Protein bars (Be sure to bring these from home, as you won’t find them in Kathmandu!)
-
Chocolate (Bring chocolate from home. The good stuff is SUPER expensive in Kathmandu.)
-
Instant coffee mix or tea (Tip #26)
Tip #24: We made our own trail mix of almonds, cashews and raisins. We bought all the ingredients in India and Nepal, so our options were limited. If you are coming from home, you can get much more creative!
Tip #25: Our muesli mix made a perfect breakfast on some of the mornings when we wanted to get an early start on the day. Plus, it meant that all we had to pay for was hot water, which saved us some money.
Tip #26: If you are a tea of coffee drinker, you may want to consider packing your own. It’s lightweight and will save you money, as you only have to pay for hot water. We even brought fresh ginger to make our own ginger tea, which helps soothe an upset stomach.
Everest Base Camp Toiletries
-
Toothbrush and toothpaste
-
Floss
-
Deodorant
-
Q-Tips
-
Wet wipes, at least 2 for each day on the trail (Tip #27)
-
Small soap and small shampoo (Just in case you want to splurge on a bucket shower! We brought soap and shampoo, but never showered.)
-
Biodegradable soap, like Doctor Bronner’s (Tip #28)
-
Baby powder (Tip #29)
-
Tampons (Tip #30)
-
Dryer sheets (Tip #31)
-
Toilet paper (You can buy more along the way, but it is as expensive as $4.50 per roll at Dingboche and higher)
-
Hand sanitizer
-
Nail clippers (great for getting dirt out from under nails)
-
Carmex or other lip slave (Tip #32)
-
Face wash, in small container (Tip #33)
-
Pocket mirror, optional (Tip #34)
Tip #27: Wet wipes are your shower. Yes, that’s right! Peeling off all your layers when you’re exhausted and in freezing temperatures, is just about the last thing you’ll want to do. We brought soap and shampoo, fully prepared to take at least a couple showers, I felt clean enough using wet wipes each night.
Tip #28: You can use biodegradable soap to wash a few articles of clothing (ahem… underwear) along the way, though it doesn’t dry very quickly the higher up you go.
Tip #29: Sprinkle a little baby powder into your hiking boots at night to combat the smell, or use some as dry shampoo when your strands get super greasy.
Tip #30: Attention female trekkers, even if you are not supposed to get your period during your trek it very well could happen. Wacky things happen to your body at high altitudes, so be prepared!
Consider that pads and tampons with applicators create lots of waste, which will sit up in the mountains or need to be trekked out on foot. Reduce your footprint for opting instead for tampons without applicators (I like OB brand) or for a menstrual cup.
Tip #31: Put a couple of dryer sheets in your packing cubes to keep your clothes smelling fresh (even when they aren’t). And giving the stinky parts of your clothes a good rub with a fresh dryer sheet will make you forget it hasn’t been laundered.
Tip #32: The air up in the mountains is incredibly dry, and my lips got more chapped than they ever had been before. We went through an entire thing of Carmex – make sure you pack enough!
Tip #33: I used face wash for the first few days, but as it got colder and access to water became scarce, I just used wipes instead.
Tip #34: The higher you go, the fewer luxuries you’ll find. I think there was an entire 10-day stretch where we didn’t have a mirror. I was happy I had a little one packed to help me braid my hair.
Things needed for the Everest Base Camp Trek (aka what we wish we had)
These are things that we didn’t pack, but thought they may have been nice.
Camelback: This would have been an easy way to stay hydrated while trekking.
Solar charger: We love our Anker charger, but solar chargers are a good option for people who spend a lot of time outdoors. We saw many people who had these babies tied to their backpacks to soak up the sun.
5 Hour Energy: This would have been a good energy boost on some of the longer days. We saw these being sold for $16-$18 on the trail!
Hand warmers: These could have solved my cold hand issue!
Pillow case: some of the pillow cases in the teahouses are not ones you’ll want to rest your head on. We wished a few times that we had brought our own pillow case.
Multivitamins: These may have helped prevent me from getting such a bad cold on the trek. Plus, most of the meals in the teahouses are very carb-heavy and lack nutrition that multivitamins can provide.
Windbreaker: A lightweight windbreaker would have been nice on some of the days. I would have replaced my long sleeve trekking shirt with this instead.
Are you planning a trek to Everest Base Camp? We can help!
We have TONS more resources on trekking EBC. Check out our Nepal Homepage for more resources and some of our favorite articles on Everest Base Camp below.
Save this article to Pinterest for later!




We want to hear from you!
Have you trekked to Everest Base Camp? What did you pack? What would you add to our packing list?
Still have questions? Comment below and we’ll do our best to get back to you!



Experience the beauty of Kerala with our tour packages and Cab Services. Explore Munnar and other popular destinations in Kerala with our specially curated packages.
Thank you so much for sharing information about Everest base camp trekking.
“come as a Guest”
“Go as a friends” Himalayan Local Guide Team
This is the most helpful, comprehensive packing list I have ever read. It made me excited for my own trip! Thanks for all the helpful tips!
What kind of trekking socks do you recommend? What percentage wool etc?
Thank you for sharing useful information about Everest Base Camp Trek
Did you reserve your tea house stay in advance or just walk in without reservations?